These pieces hopefully stay together:

Left piece is top up and right bottom up.

KA metamorphoses to DT. Longer explanation is that I decided to convert one front crashed Ford KA to Do It Yourself Tractor.
These pieces hopefully stay together:
Left piece is top up and right bottom up.
These pieces are now about the correct shape:

I still need to make the bevel a little bit deeper and after that grind all the paint off before welding can be started.
Maybe two thirds of wheel mount parts are ready:

But still one third missing not even talking about the next steps like building the axle + diff frame/support structures.
Let’s see do I have a ready front axle at next week… But I believe this is one of the most difficult engineering challenges at this project. And it needs to go right because the rest of the tractor will be built to match this.
I was able to start welding pieces together today, so I guess it is safe to say that the construction of the front axle has been started:
And this is the current status:
 Hopefully tomorrow I can continue building the lower ball joint mounts. Upper ball joint mount will need a couple of pieces also and I have a plan to connect the mounts (upper & lower) together so that they can be unbolted and dismantled if needed.
First piece is ready and second is maybe one third of ready state:

I made a bevel around the hole to ease up the welding process. Actually that is must to have at this case. That weld needs to be really strong since it carries the weight of the tractor.
I need to drill probably about 28 of 9mm holes:

This is the first piece…
Dear Santa, please bring me a plasma cutter at next Christmas.
Today I spent quite long time inventoring my spare parts and scrap metal storages for the front axle construction. I think I now also have a solid plan how to build the front axle.
Here are a couple of photos from the preparation work:


The last photo is about the lower ball joint mounts. That piece of metal will be cutted probably to four parts.
Here is the washed diff just before installing it back to the gearbox. Not looking so pretty, but I think it should be strong enough. Last layer was welded with mig (with rather moderate power) and all the deeper layers with electrodes: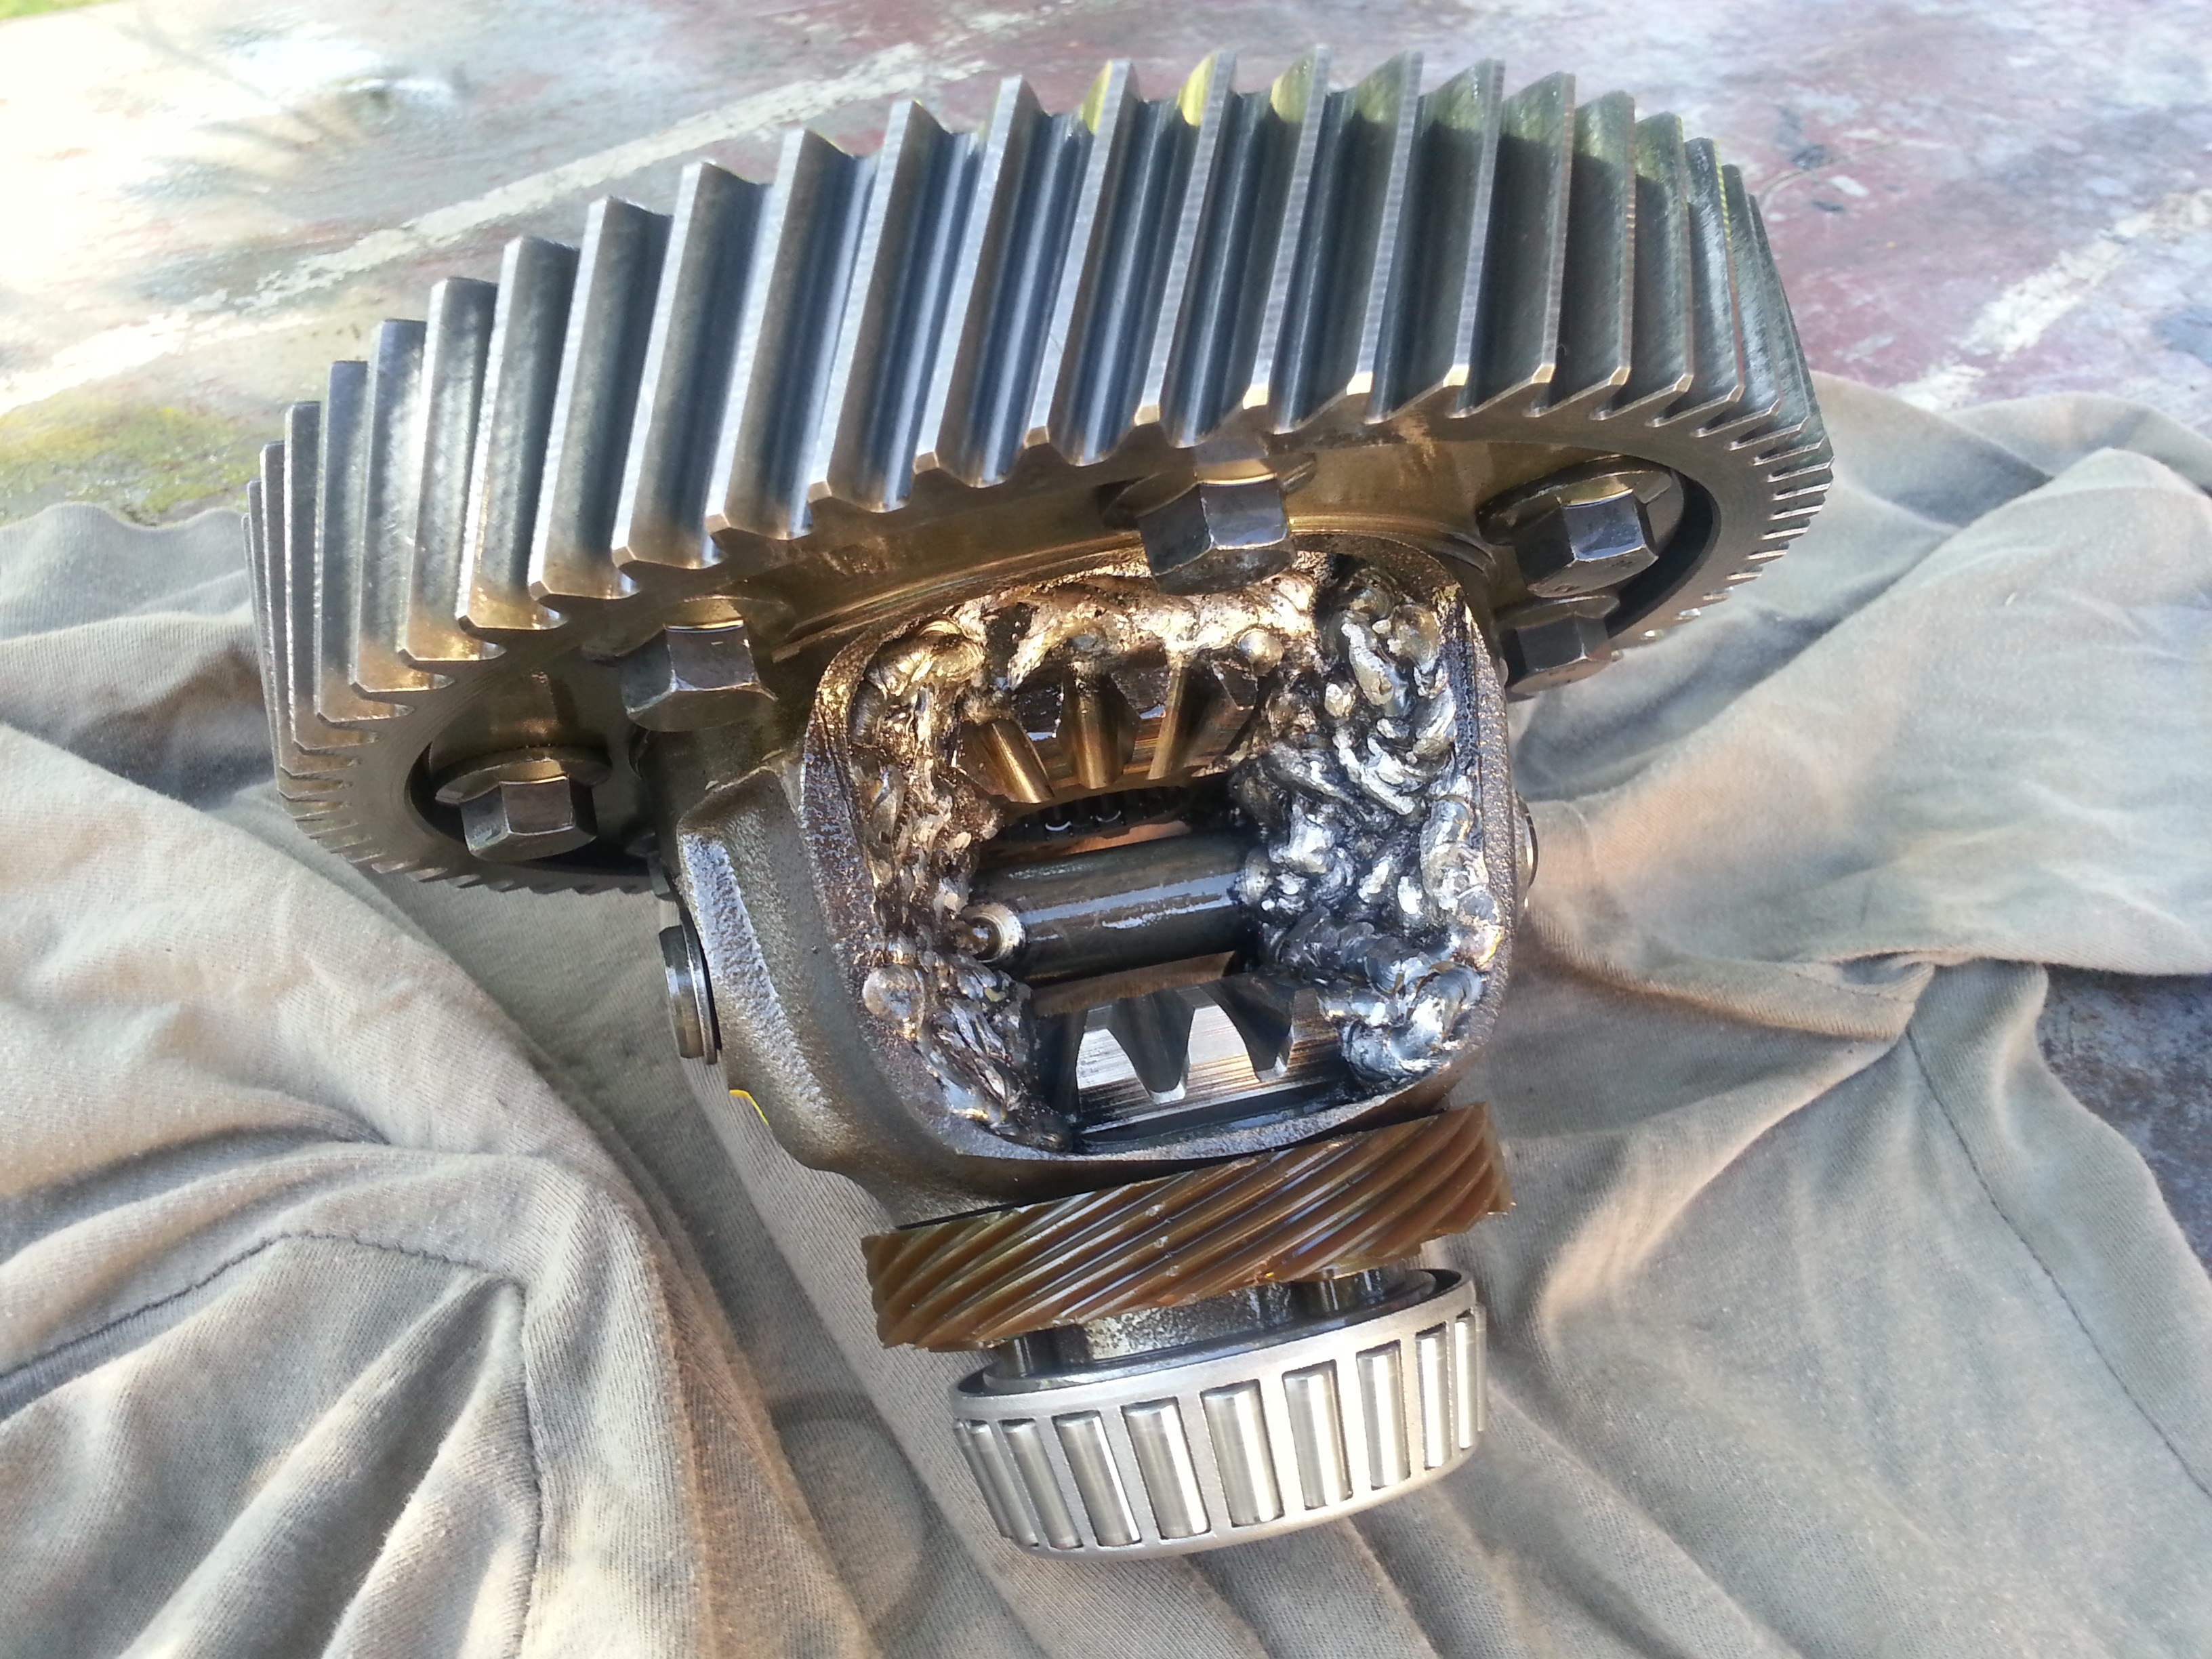
A couple of photos when I was assembling the gearbox back to one piece:  I spotted a perfect location for a new oil drain plug since the original is so high at the gearbox that it leaves almost half of the oils still inside. This was a blank 10mm hole, which I drilled through and made 12mm threw to it.
It aligns perfectly with the bottom level, so maybe it was meant to be a drain plug place which is not used for some weird reason. The bolt and copper seal already in it’s place:
Couple of photos while assembling the fifth gear:

And finally all bolts bolted back where they came from + all the parts inside the box. I tested all the gears and they seemed to go in and also looked to work as expected when I rotated the input shaft. Gearbox paired back again with the engine:

Next task is to wash the diff and clean all the excess stuff out. Hopefully today I have the gearbox once again in one piece.

I started welding the diff first doing very small welds with MIG:
 Next I removed driveshafts and started to weld with electrodes (312-17 / LIMAROSTA 312 2,5mm). This is very time consuming process since I only can weld a short while until I need to cool down the diff because I don’t want to let it too hot. Today I was able to do the first deep welds for each 4 corners and both sides, totaling to 8 welds and some 10-15min cool down between each weld. Next I will weld more and try to adhere the gears properly to the frame.
Seems that choosing electrode welding was the right choise since there is also small amount of plastic behind the second largest gears. Mig welding would have been very spotty because of that. And also those electrodes which I’m using seem to be very easy to weld and able to melt the steel deep so the gear teeths are disappearing (melting) easily to one lump of steel. I will probably continue this at Saturday since tomorrow will go with other activities.