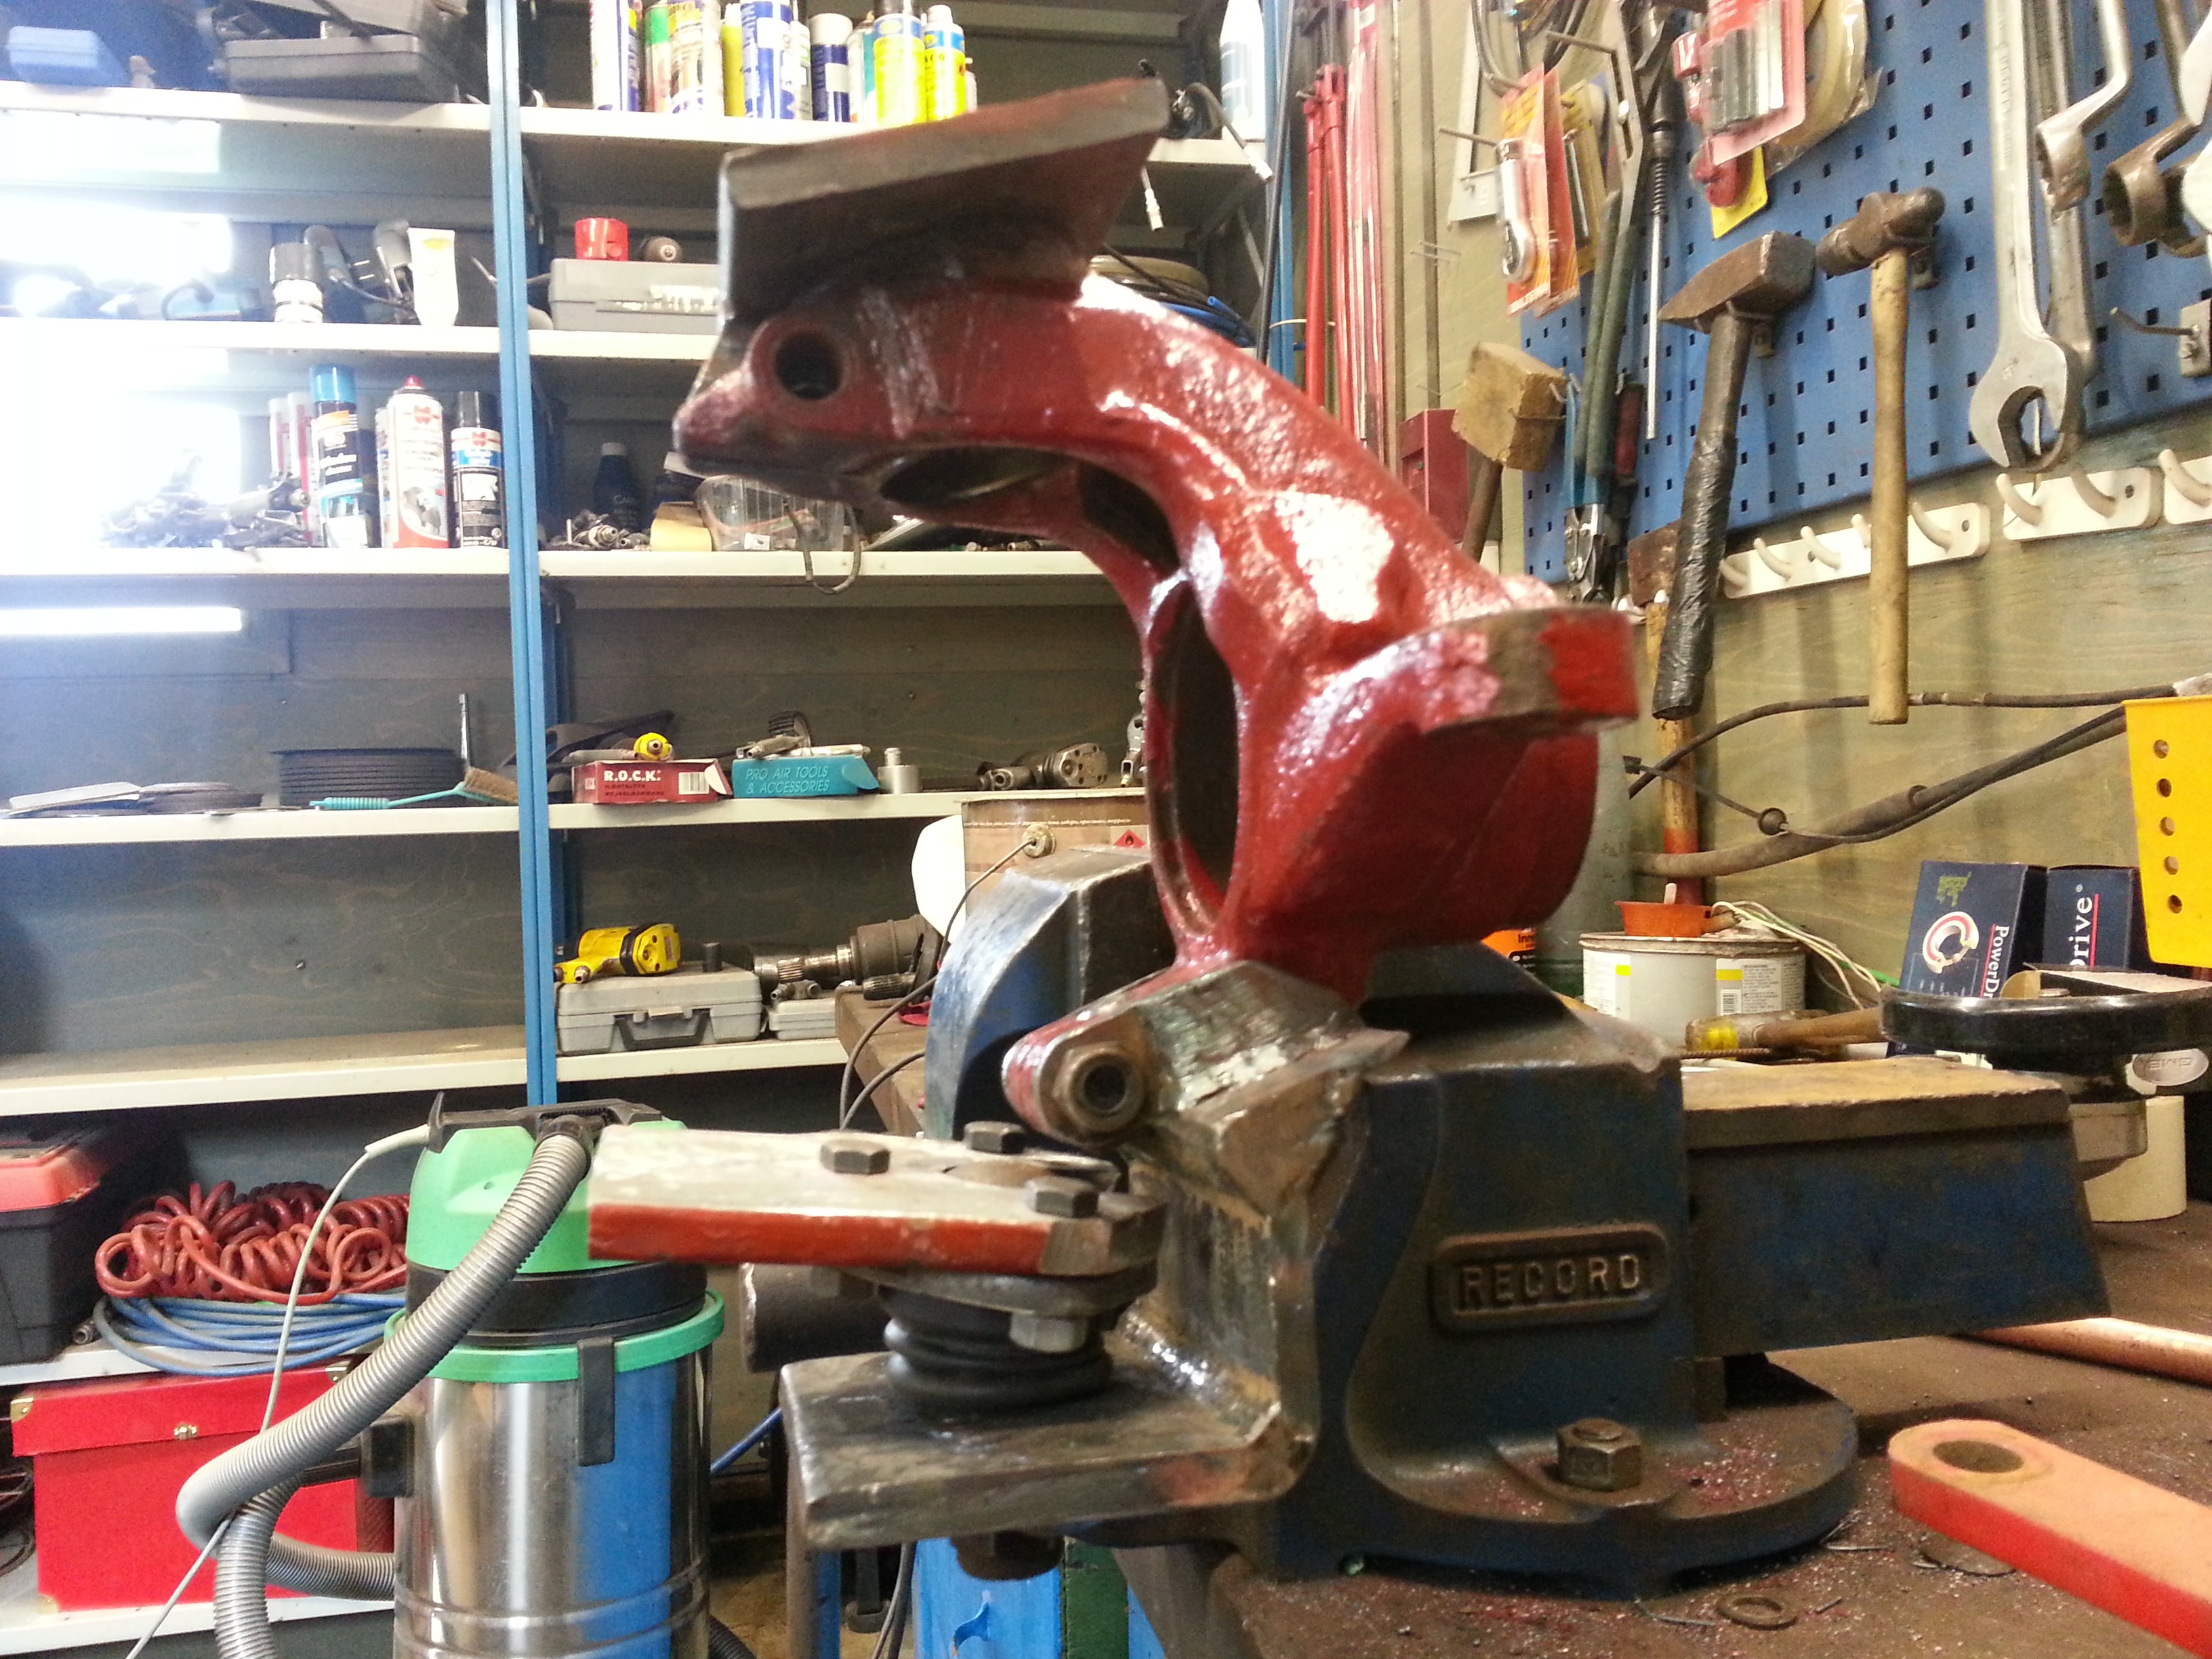
Category Archives: DIY Tractor

KA metamorphoses to DT. Longer explanation is that I decided to convert one front crashed Ford KA to Do It Yourself Tractor.

First rectangular frame pieces cut

The first rectangular frame pieces for making camber adjustment possible has been cut:

20140831_150332But unfortunately that’s about it what I have managed to do today for the tractor project. I also checked my scrap metal stockpile and carried materials for the next three frames outside the garage.

This morning went with working on garage maintenance, some grass trimming outside near the walls and trying to stop one small leak at the roof which is not that obvious where it is actually leaking.


Wheel hub mounts bolted to final configuration

Today I needed to work with my Sierra since I needed to replace lock barrels. I got tired of starting the car with screwdriver since steering wheel lock barrel was so worn that it did not rotated far enough to reach the start position. As a workaround I had taken the electricial back plate loose so I were able to operate it with the screwdriver. 🙂

For my tractor project I did the first step for bearing installation and bolted the parts together I had so far got ready. Hopefully I don’t anymore need to unbolt these:

image

Front axle 50% ready

Today I finished these parts:

20140824_121603And I also painted those:

20140824_131350Since my summer vacation ends today the pace of this project will be slower from now on. But the next task I have planned to do is to continue preparing front drive shafts and bearings. After that I will continue with the front axle frame. I also could create the rectangular frame for the ball joint upper mounts, but let’s see in what order I will be doing these.


Last welds to the wheel hub area

Now I think all the welds are done for the wheel hub area:

image

Some clean up and  trimming tomorrow. Then some paint and these parts are done.

Next thing to do is to create the front axle frame, but that will not happen at next week since my summer holiday ends and I need to travel almost the whole next week for work related things… :-/

Final parts to wheel hub area of the front axle

Today I trimmed the upper ball joint mount a bit and welded small piece of steel to both sides for upper/lower ball joint mount connection rod:

image

Not as much progress today as I hoped, but work continues tomorrow.

Preparing yet another batch of pieces to the front axle

This was my today’s achievement:

20140821_173758And this is how it fits to the lower ball joint:

20140821_124341Seems that I’m not able to finalize the front axle at this week, however I will be working with it up to Sunday since Monday I need to return to work…. After that the pace will be slower but still I will try to get something done every now and then.

Lower ball joint upper mount will be tilted upwards slightly to get more clearance between the parts and will also give more ground clearance as well.

My next task is to make upper & lower ball joint connection tomorrow. That is needed for additional stiffness and load carrying since it will guarantee the load from both ball joints is transferred to the wheel mount. After that I will create a rectangular frame to connect both ball joint upper mounts. That rectangular frame will be bolted to the main frame of the front axle. Maybe I’m over-engineering this, but hopefully it is better that way in this case.


Making the ball joint mount forks

This is also somewhat time consuming business:

image

And I need to make at least one similar fork like this, but probably three if I don’t figure out some other way to the upper ball joint mounts.

Seems that tomorrow I can go a bit further from the wheel hub area

Todays efforts:

20140820_183451
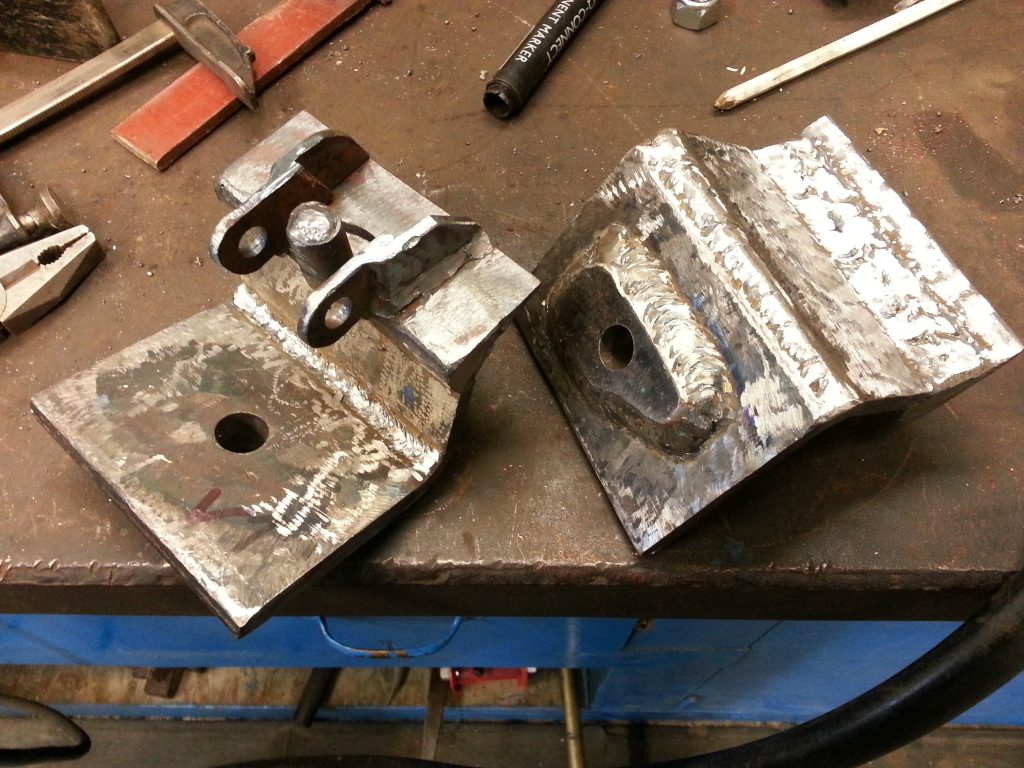
Now I have ready lower ball joint mounts. 🙂

Tomorrow I need to create short rods which will connect to the ball joint upper ends. The rods will be short because they will be welded to a rectangular frame which will be bolted to the front axle main frame. I decided to create that extra frame because that can be then used for camber adjustments by adding spacers between the bolted connections. Somebody might ask why I want to have a camber adjustment possibility at tractor, and for that I don’t have any other answer than I just to want to have that. 😛

Couple of more photos when pieces are at their correct places:

20140820_184305 20140820_184346 20140820_184728
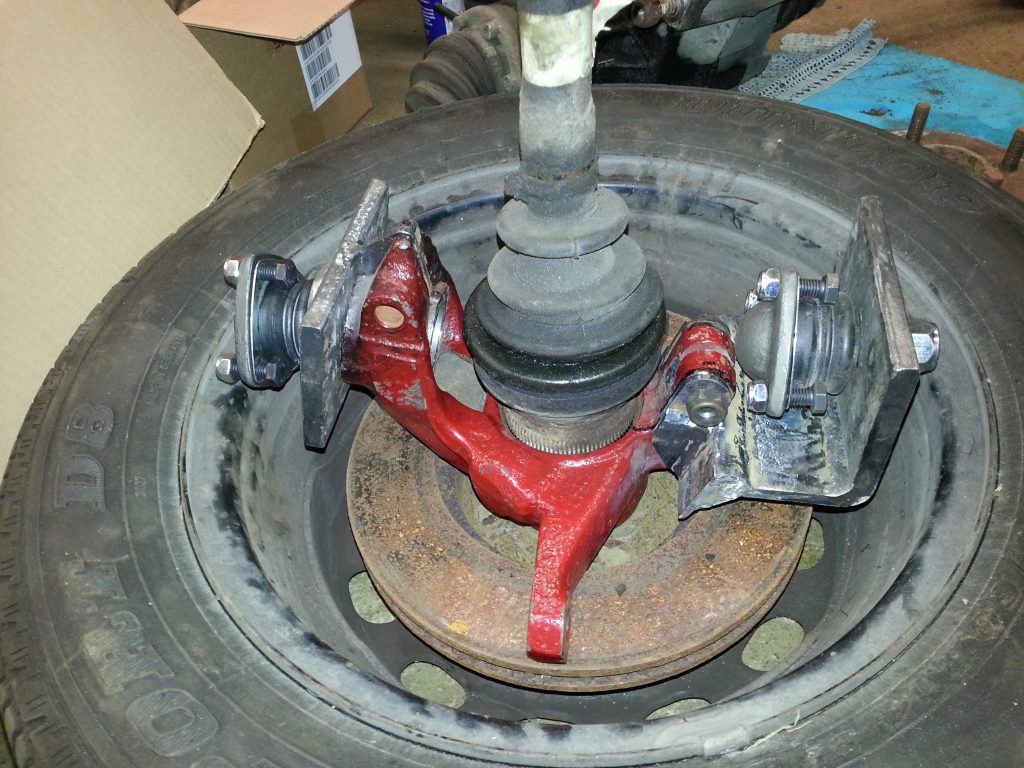
Those upper and lower ball joint mounts will be connected together. Lower mount connection I will weld and upper mount connection will be bolted. But before I can make that connection I need to create the short rods for ball joint upper ends so I will know how much clearance I will need.

Somebody might also be able to notice that I have cut the lower ball joint bolt a little bit. There are two reasons for that, first one is that it would not go to it’s place without doing so and the second one is that it was too long anyway and that would have been the lowest fixed structure of this whole tractor. I even drilled a puller mark to the ball joint bolt I cut, even it most probably is never needed to be used.


Some progress with the front axle

Still couple of pieces missing but soon I can start working with bigger support structure of the front axle:

image

This whole thing will come couple cm out from the rim compared to this photo because wheel hub, bearings and brake disc is missing:

image

Piece after piece to the front axle

This hopefully is the most complicated part of the whole DIY tractor project, or at least for those things that I need to build from scratch:

image

Still I have the hope to get the front axle ready during this week. But unfortunately for the next two days I’m not able to work as much in the garage like today.