Beefing it up

I added an additional aluminium support beam to get the back shape right and for better mount point for the rear lights.

image

The lower wood beam is not mounted yet, it will be slightly higher than it is currently.

Outside I will install aluminium plates where the rear lights will be mounted.

Camping trailer progress

I started to build the support structures:

image

To be continued tomorrow…

image

Drawbridge

Since people were complaining about too high first step I decided to do something about it:

image

Camping trailer project progress

I continued tearing the rear wall to pieces:

image

And front wall panel has been attached. Now waiting glue to dry to be able to continue with the front wall.

image

Crispy rear wall, update 2

Inside:

image

Removed piece:

image

Crispy rear wall

So yammy and crispy:

image

Luckily the front wall starts to be ready:

image

Today I applied some clear coat to new front panel I created yesterday. Hopefully tomorrow I’ m able to mount it in its place.

Camping trailer – update 2

I got heating radiators installed and removed the heater burner at the front of the trailer. I will be considering what to do to that burner but at least the radiators are already in place.

image

image

Tomorrow I need to purchase  some materials for the rear wall + one piece to the front wall.

Camping trailer

Some progress slowly, but surely:

image

Hopefully I’m able to install the heaters still today and maybe some other parts as well. Tomorrow I would like to tear the rear wall to pieces. 🙂

Continuing the trailer project

This is the current state of my camping trailer project:

image

Tomorrow the front wall should be ready and I can start working at the rear wall. There is a similar job waiting to be done.

Fixing Volvo S40 Electric Window Lifter

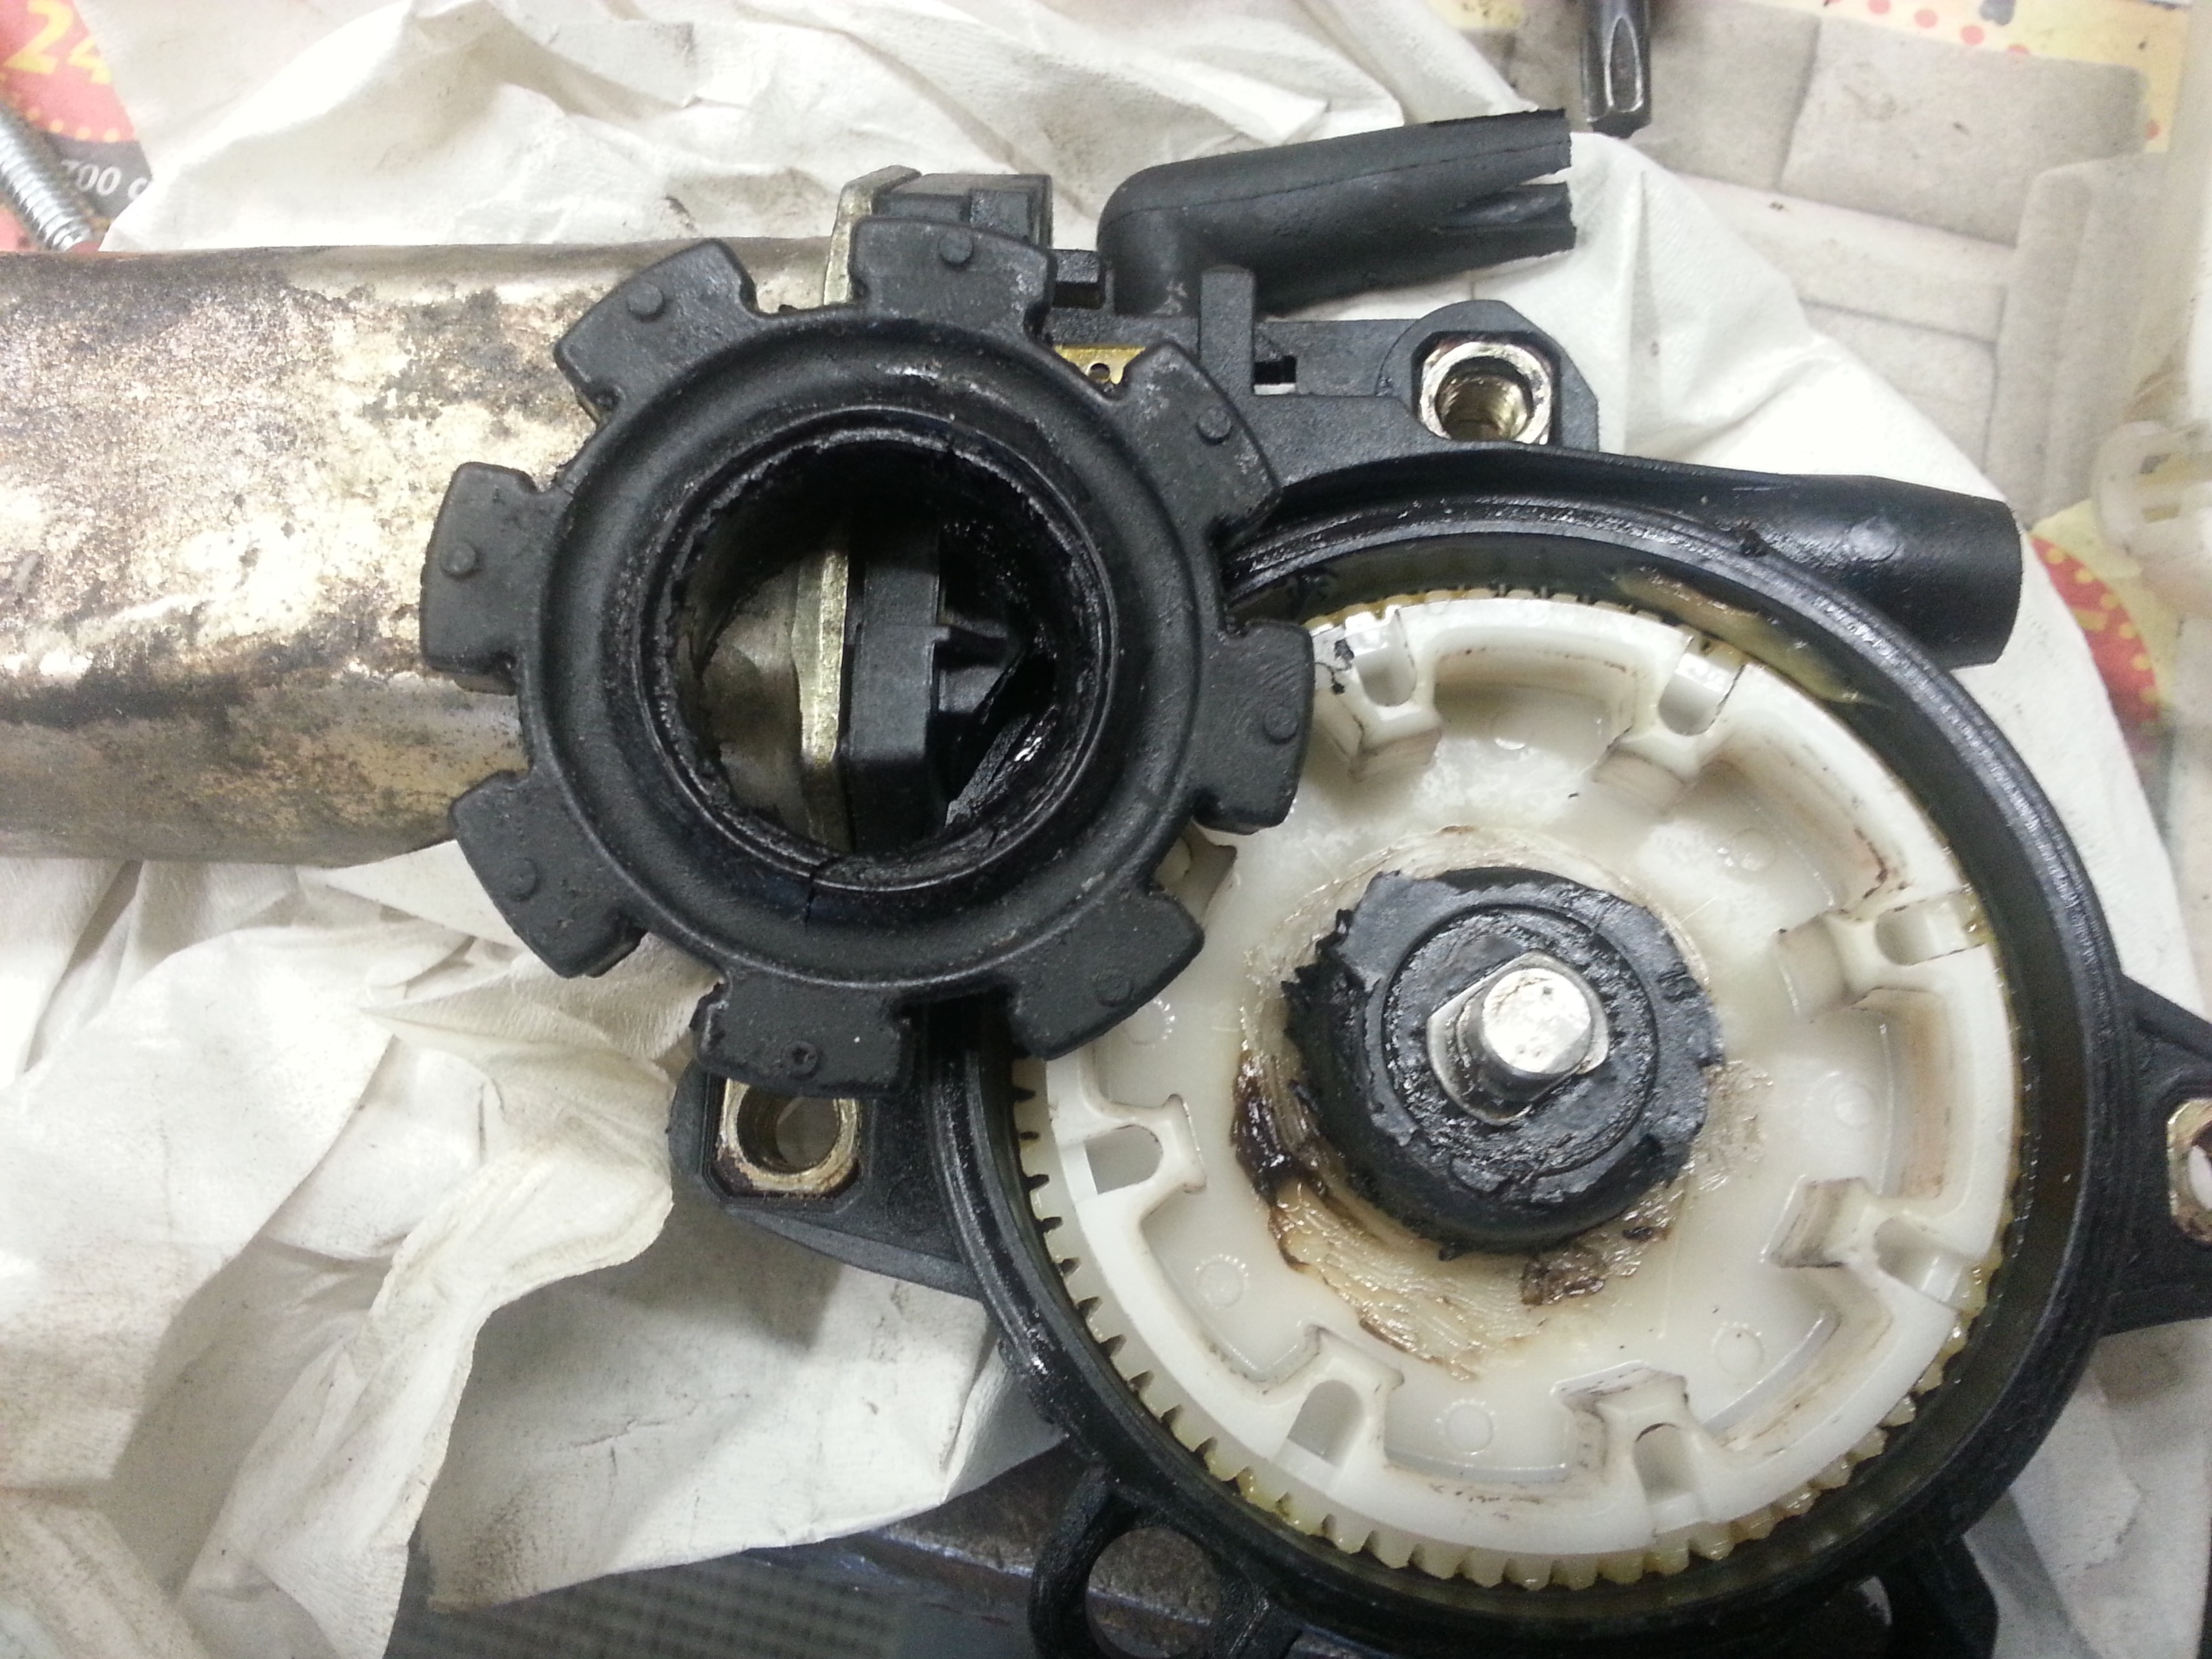
Today I got a SMS message from my dad where he said that the driver’s window is not willing to go back up… So I needed to open the door panel at the evening and remove the lifting mechanism. And here is the problem:

20140429_181911

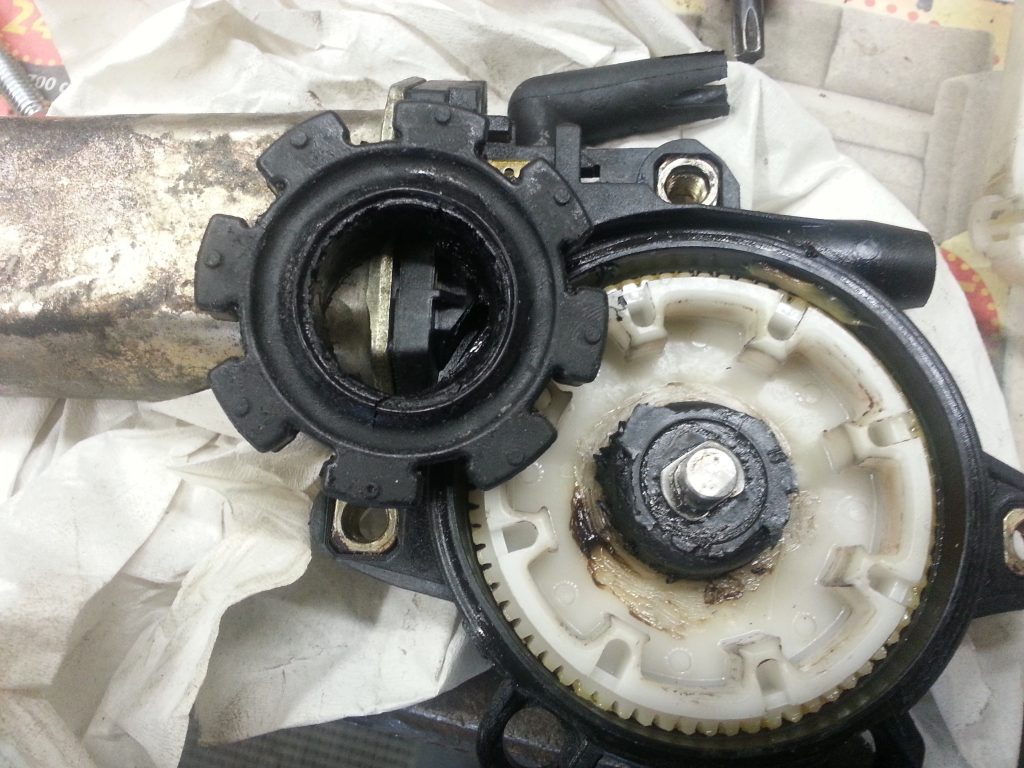
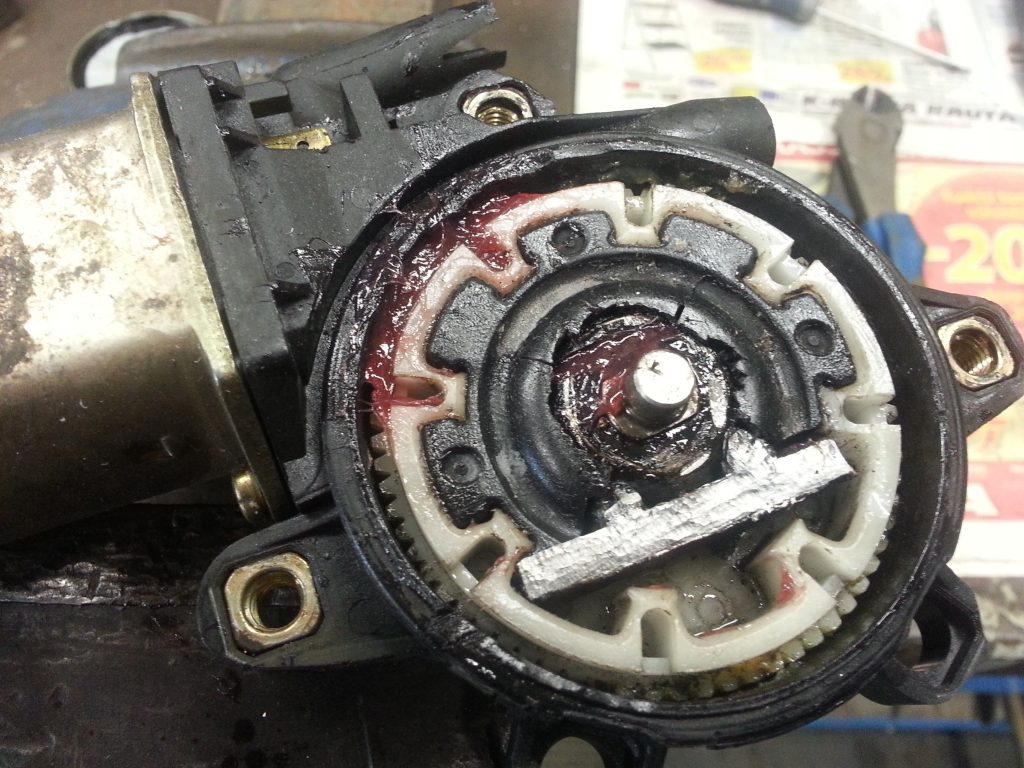
It turns out that the rubber gear inside the motor’s bevel gear had broken off from it’s vulcanization.

After a some thinking and test cutting I decided that this can be fixed by welding some metal if I’m lucky enough:

20140429_185957


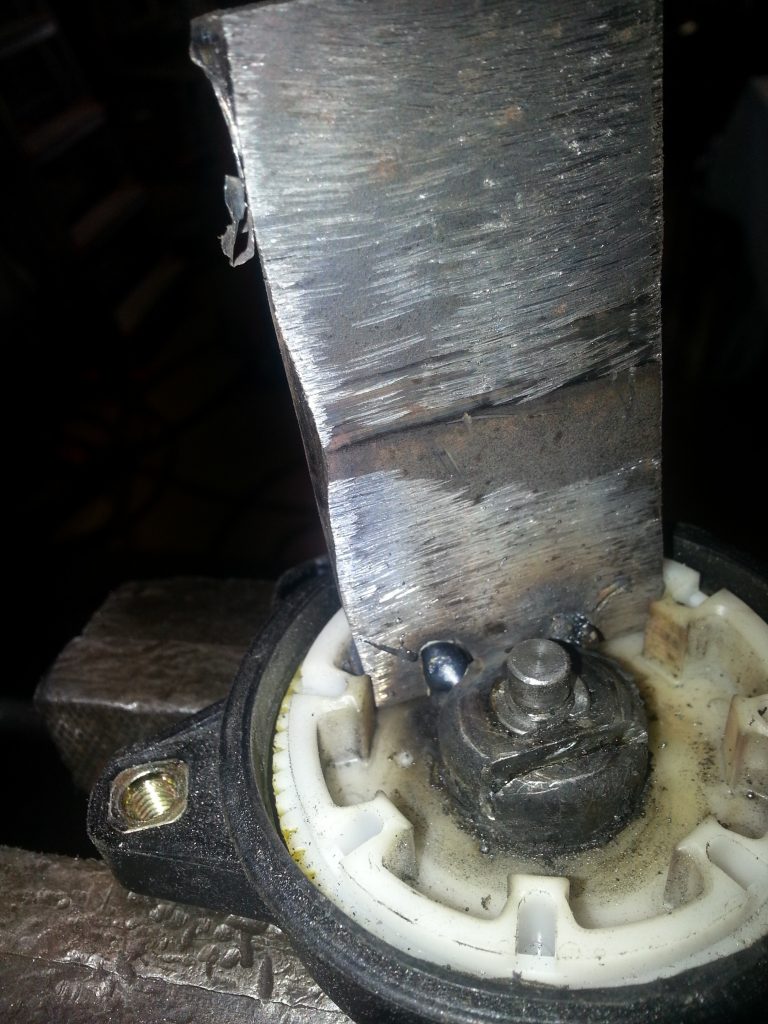
That cut you see at the picture was totally unnecessary and I’m not recommending that you do such thing. It was a test which did not worked out. Luckily the welding held and after cutting the excess piece out:

20140429_190814

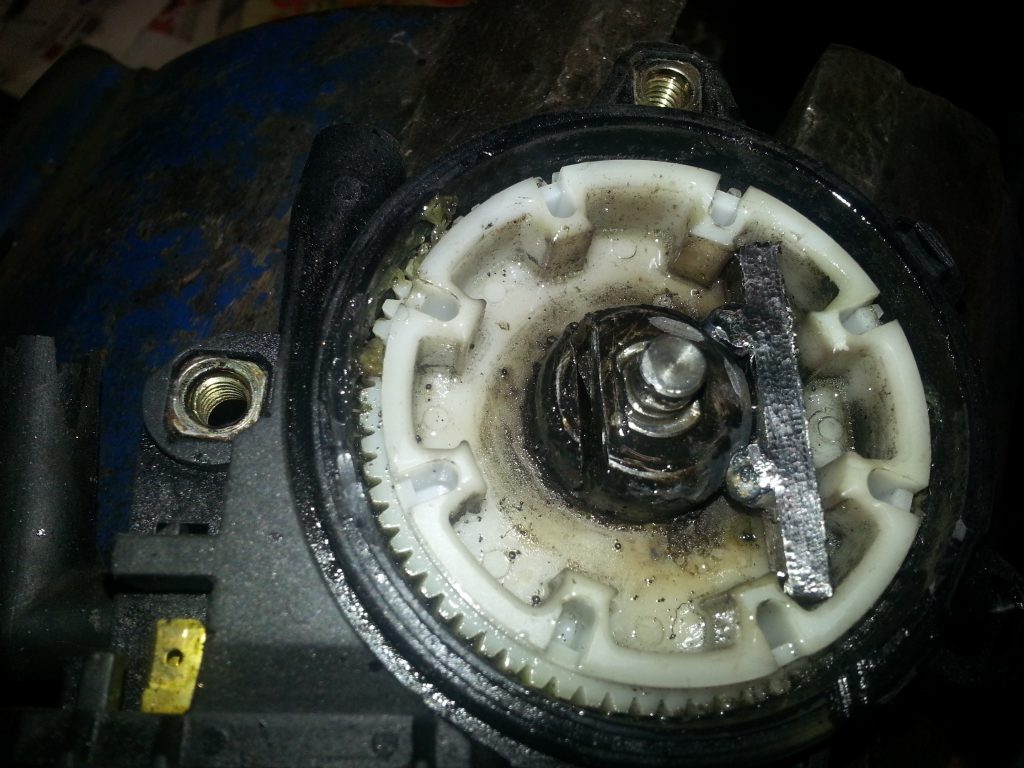
I also decided to put a piece of that rubber gear back and added some grease:

20140429_191234

Then I put the motor back together and amazingly enough it worked. I also assembled the window lift mechanism and put it back inside the door and still it worked. 😀

Let’s see how long this works but at least it is now working… Downwards the window goes like earlier, but upwards it is a bit slower. Later I will add some silicone grease to window seal to see does it help.

New lift mechanism would have cost 140€ from Motonet and the delivery time would have been long since they did not had it at stock. If this brokes down yet again then I need to order a new lift mechanism but so far so good. If I need to do this to the other door most probably the end result will be even better (or so I hope).